App-Wide Overlays in SwiftUI
Its very easy to do an overlay in SwiftUI. The problem is making app-wide overlays that go over every view. This article will show you how to do it using SceneDelegate.
Posted by
Related reading
Use Face ID or Touch ID in your SwiftUI App
This Tutorial showcases how to add Biometric Authentication (Face ID, Touch ID) to your iOS App built in Swift and SwiftUI.
In order to implement In-App Notifications in SwiftyLaunch Release 1.1 we needed to create a robust system to be able to show them all throughout the app.
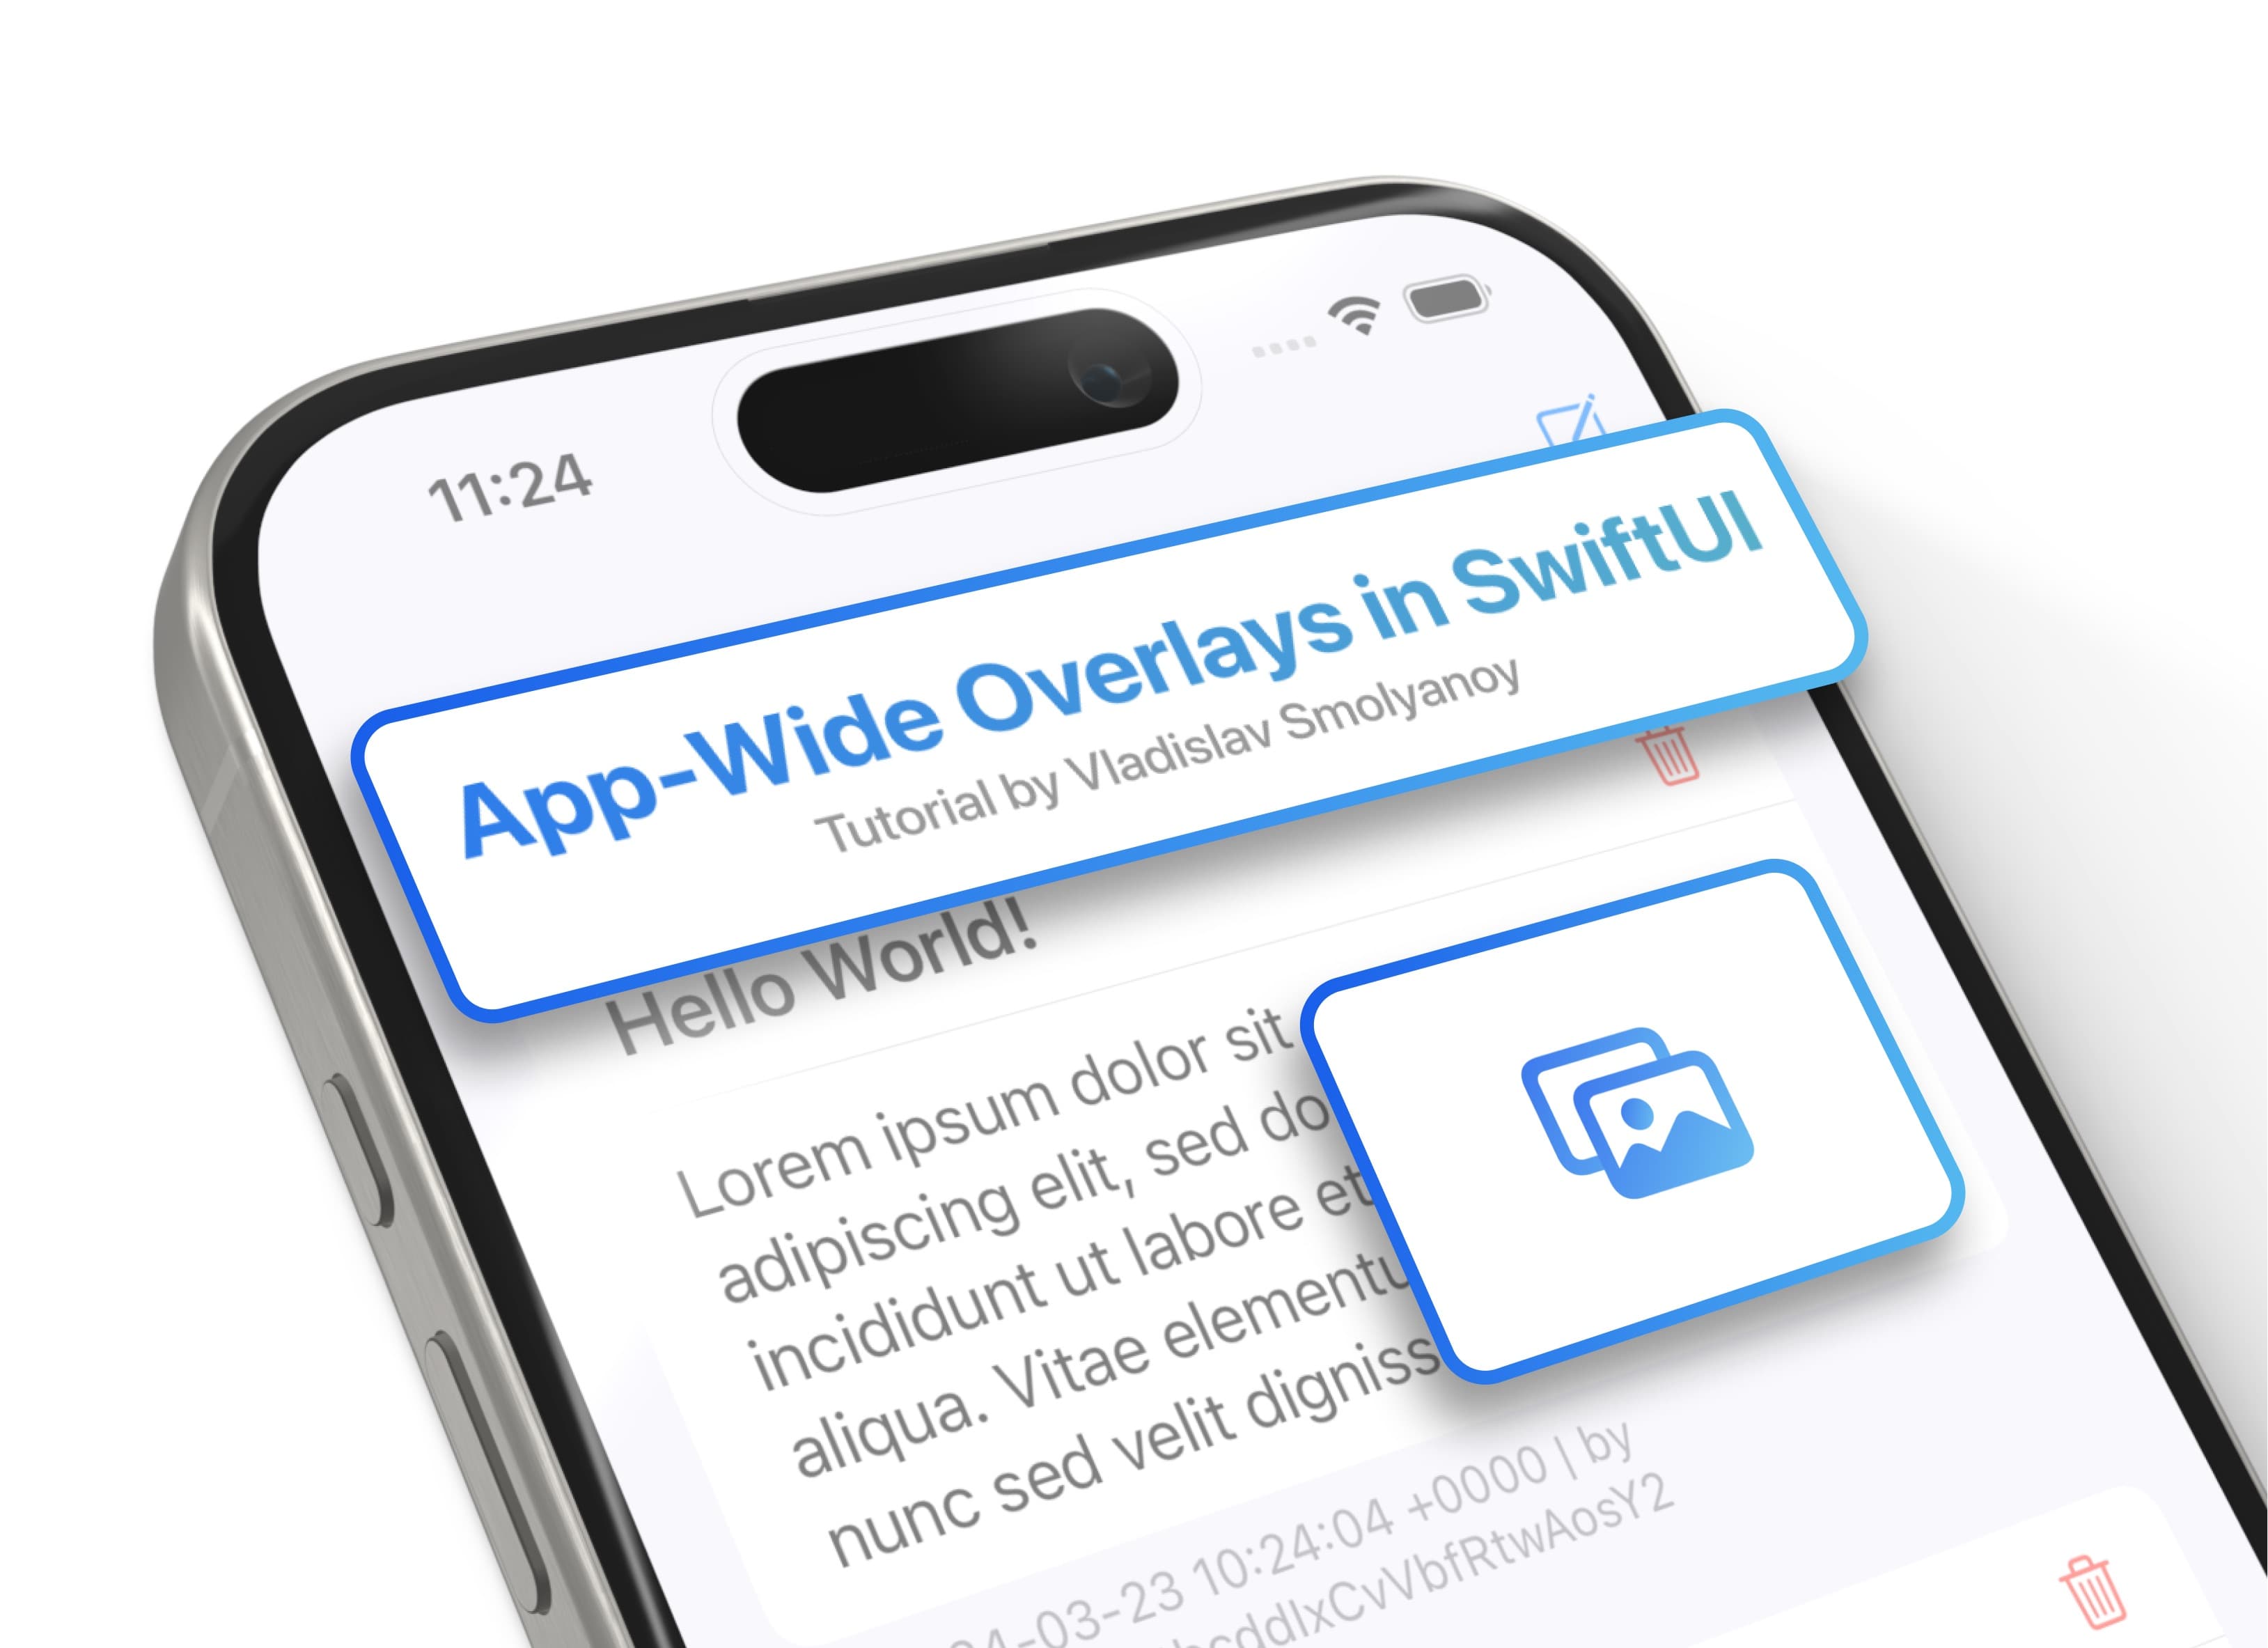
The first idea was to attach a view modifier to the Root View of the App, ContentView, that would listen to NotificationCenter updates that we can could call from anywhere in the app. The View Modifier would show an overlay that sits on top of the View like this:
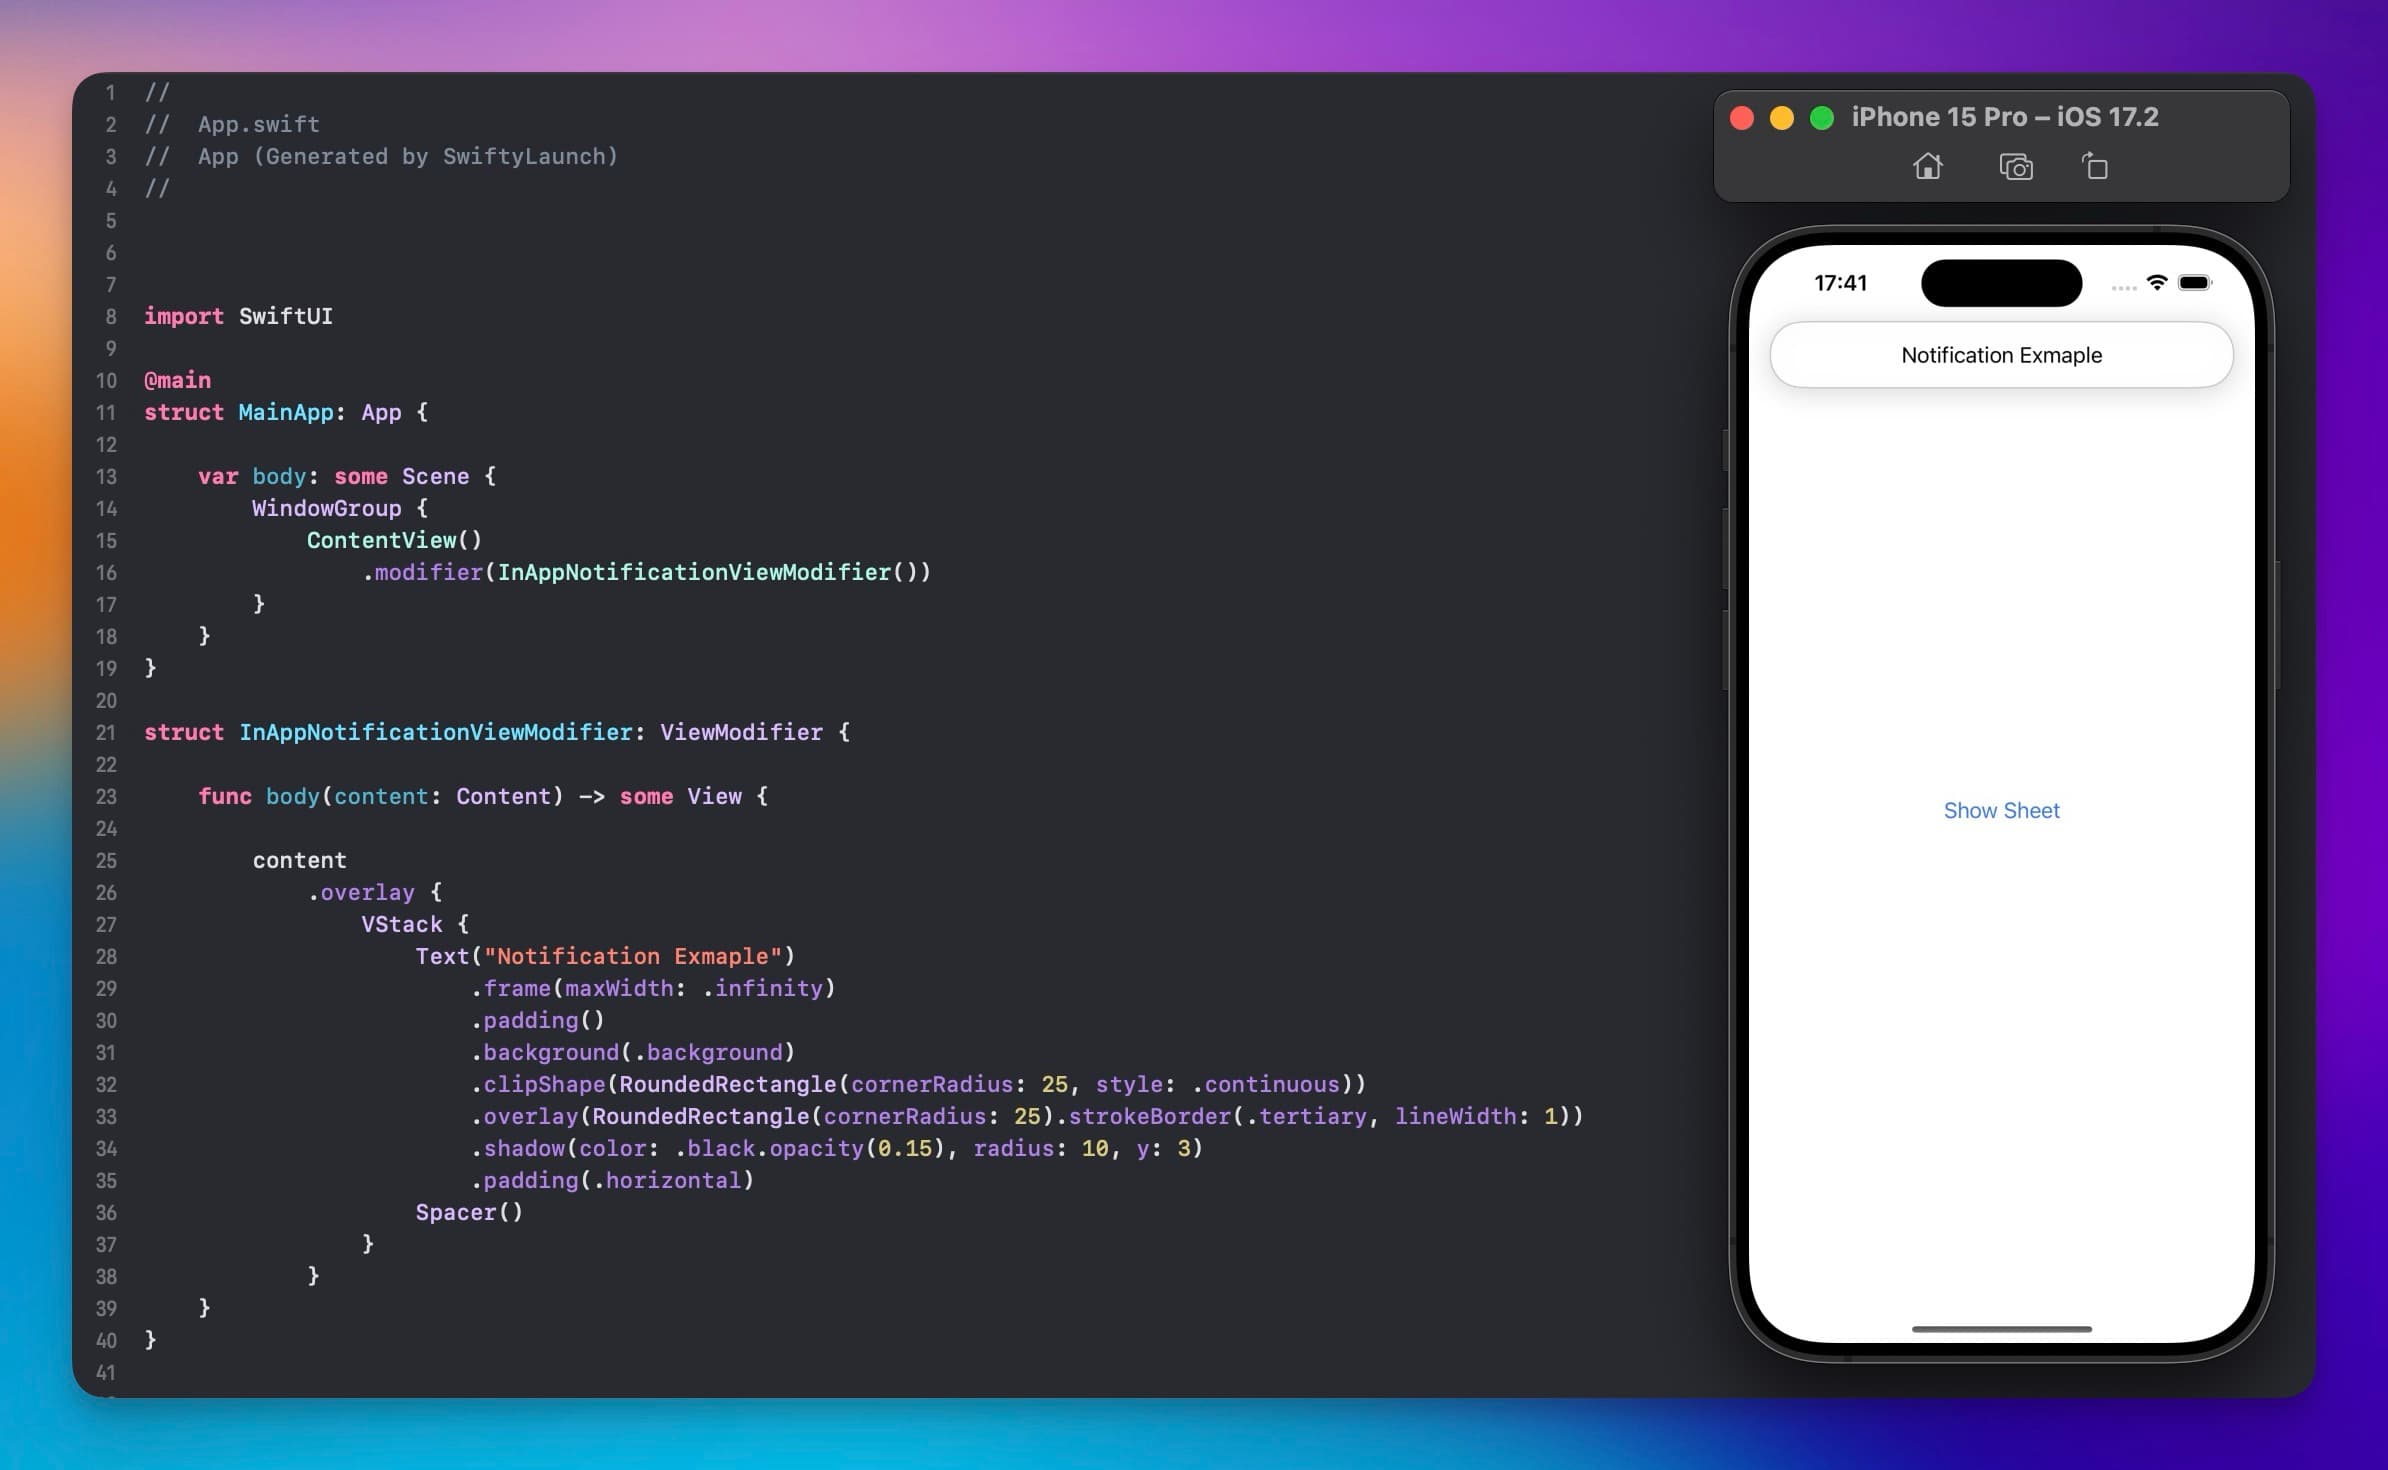
Works great, right? Not exactly. If we decide to show a sheet in the View, we can notice that the notification will stay attached to the view behind the sheet.

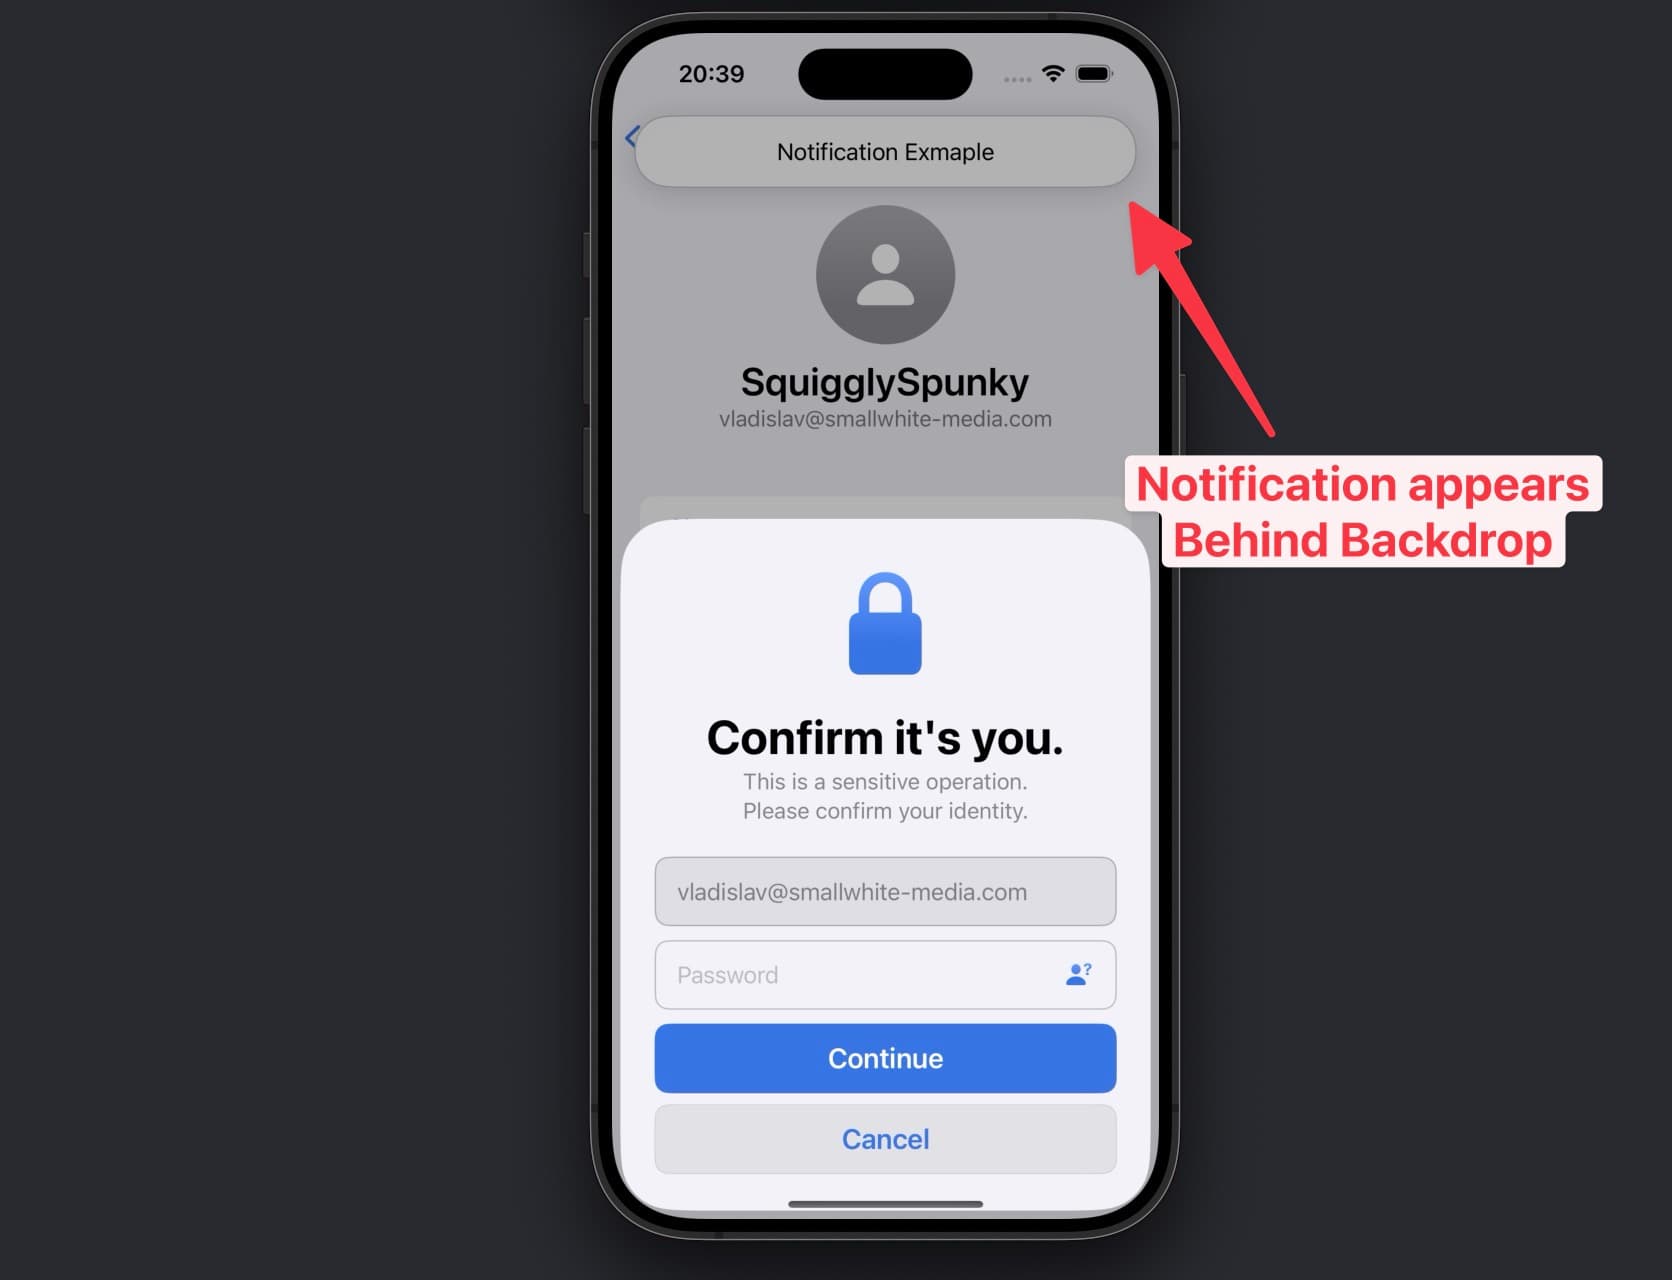
Additionally, we can notice that it also doesn't work with SwiftyLaunch's Re-Authentication Sheet: it also appears behind the sheets backdrop.
A potential solution would be to attach the View Modifier to each potential sheet that our app has. If we do that, we kinda get around that issue, but we can see that the In-App Notification now appears on both the sheet and its underlying view. Not ideal.
Not to mention that we would have to attach this view modifier everywhere throughout the app, which could very quickly lead to unwanted visual bugs if forgotten about.
UIKit and SceneDelegate to the Rescue
After toying around with the view modifier for a couple of hours, placing it in different places, adjusting the z-Index and googling, I figured that only way around it would be fall back to UIKit.
What we have to do, is to create a custom SceneDelegate for our Application. Here, in the scene function, we will take the current window scene and setup an additional overlay window that we can use to show our notifications.
In the setupSecondaryOverlayWindow function, we define the View (= ViewController) that we will overlay over all the app views. Here, we just created a EmptyView() that will fill the window with our in-app notifications view modifier attached to it. Then, we will use a custom PassThroughWindow of type UIWindow to detect touch input on the app-wide overlay views (e.g. when someone taps on the notification) and to pass all other taps to the underlying app view.
The code that does this is as follows:
@main
struct MainApp: App {

	@UIApplicationDelegateAdaptor(AppDelegate.self) var delegate

	var body: some Scene {
		WindowGroup {
			ContentView()
		}
	}
}
The App Delegate to associate the SceneDelegate:
class AppDelegate: NSObject, UIApplicationDelegate {
  func application(_ application: UIApplication,
                   didFinishLaunchingWithOptions launchOptions:
                   [UIApplication.LaunchOptionsKey : Any]? = nil)
  -> Bool { return true }

  func application(_ application: UIApplication,
                   configurationForConnecting connectingSceneSession: UISceneSession,
                  options: UIScene.ConnectionOptions) -> UISceneConfiguration {
  	let configuration = UISceneConfiguration(name: nil, sessionRole: connectingSceneSession.role)
  	if connectingSceneSession.role == .windowApplication {
  		configuration.delegateClass = SceneDelegate.self
  	}
  	return configuration
  }
}
The Scene Delegate to setup the overlay window:
final class SceneDelegate: NSObject, UIWindowSceneDelegate {

  var secondaryWindow: UIWindow?

  func scene(_ scene: UIScene,
             willConnectTo session: UISceneSession,
             options connectionOptions: UIScene.ConnectionOptions) {
  	if let windowScene = scene as? UIWindowScene {
  		setupSecondaryOverlayWindow(in: windowScene)
  	}
  }

  func setupSecondaryOverlayWindow(in scene: UIWindowScene) {
  	let secondaryViewController = UIHostingController(
  		rootView:
  			EmptyView()
  				.frame(maxWidth: .infinity, maxHeight: .infinity)
  				.modifier(InAppNotificationViewModifier())
	  )
	secondaryViewController.view.backgroundColor = .clear
    let secondaryWindow = PassThroughWindow(windowScene: scene)
    secondaryWindow.rootViewController = secondaryViewController
	secondaryWindow.isHidden = false
    self.secondaryWindow = secondaryWindow
  }
}
The PassthroughWindow class to pass touch input to the underlying app if nothing relevant is tapped on the overlay:
class PassThroughWindow: UIWindow {
  override func hitTest(_ point: CGPoint,
                        with event: UIEvent?) -> UIView? {
    guard let hitView = super.hitTest(point, with: event)
    else { return nil }

    return rootViewController?.view == hitView ? nil : hitView
  }
}
The Example NotificationView Modifier:
struct InAppNotificationViewModifier: ViewModifier {
func body(content: Content) -> some View {
  content
    .overlay {
      VStack {
        Text("Notification Example")
          .frame(maxWidth: .infinity)
          .padding()
          .background(.background)
          .clipShape(
            RoundedRectangle(cornerRadius: 25, style: .continuous)
          )
          .overlay(
            RoundedRectangle(cornerRadius: 25)
              .strokeBorder(.tertiary, lineWidth: 1)
          )
          .shadow(color: .black.opacity(0.15), radius: 10, y: 3)
          .padding(.horizontal)
        Spacer()
      }
    }
  }
}
And we're done! All the content of the notification view modifier will appear on top of every view in your app, no matter if a sheet is shown or not. You can also easily adapt this code to your needs to do other overlays as well!
Features like this and others can be avoided by using SwiftyLaunch. Instead of writing the same code every time you start a new iOS Project you can let SwiftyLaunch generate all the essential boilerplate for you. It's a one-time purchase and the launch discount is still on!